
bttn portal overview
The bttn portal is the place where you manage devices, create actions, and monitor presses. Use it to set up what happens when a bttn is pressed and to keep track of activity over time.
DASHBOARD
The dashboard gives you a quick overview of activity across your bttns. It helps you confirm everything is running and shows the most recent activity at a glance.
- Lifetime presses
- Active and inactive bttns
- Recent actions
Click the setup dashboard button to adjust what you see on the dashboard.
BTTNS
The bttns section shows all registered devices in your account. From here you can register new devices, check connectivity, and manage device-specific settings.
- View your device list and connectivity status
- Register new bttn
- Download device reports
- Open a bttn to assign actions
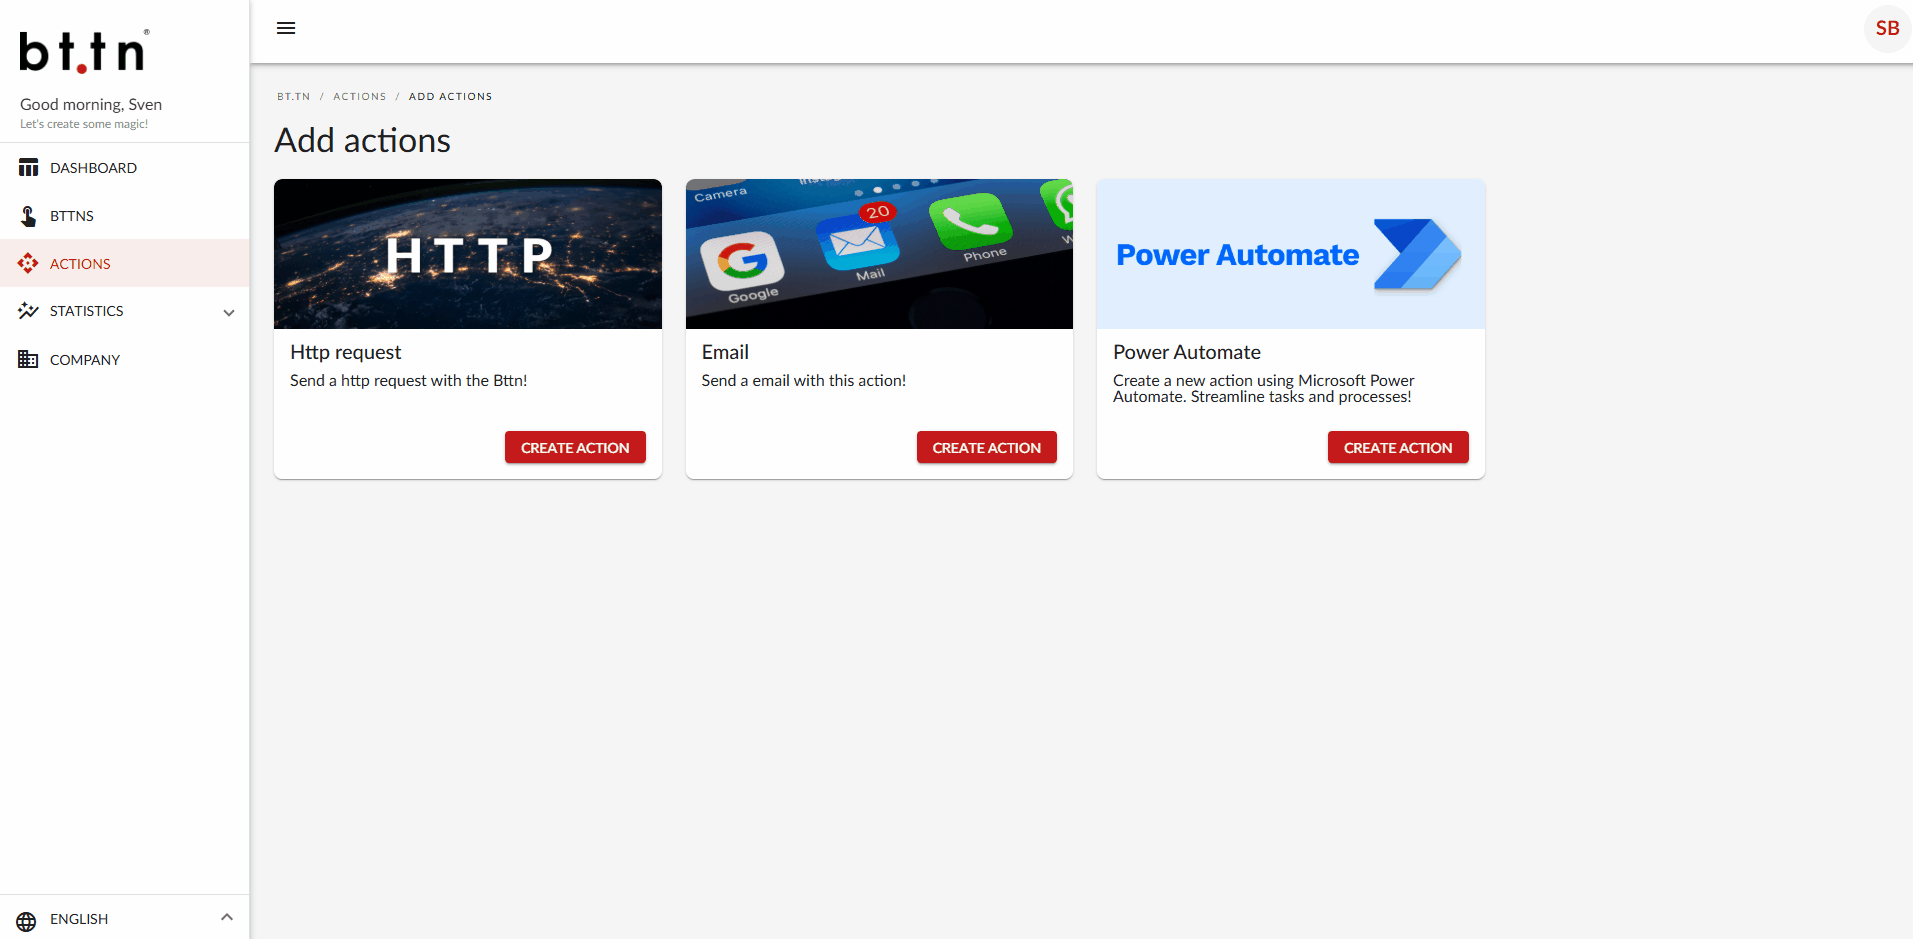
ACTIONS
The actions section is where you create what should happen when a bttn is pressed. Actions are reusable, so you can create them once and assign them to multiple bttns.
- HTTP action
- Email action
- Power Automate action
After creating an action, assign it to a bttn from the bttns section.
STATISTICS / PRESSES
The statistics section provides a complete overview of all bttn presses. Each press is logged individually so you can verify what happened and when.
- Timestamp of the press
- bttn name
- Action name
- Trigger type (single or double press)
- Status of the action
- Result message
You can filter presses by status, trigger type, or date range. This page is mainly used for troubleshooting, validation, and usage analysis.
COMPANY
The company page contains your organisation details and account-level settings. This information is used for communication, billing, and API configuration.
- Company name and logo
- Business and billing address
- Primary and billing contact details
- Callback API tokens
Callback API tokens are used when configuring HTTP actions with callbacks. These tokens allow the bttn platform to securely receive status updates from your systems.
How to make an email action
An email action sends an email notification each time the bttn is pressed. This is useful for support alerts, facility notifications, or simple incident reporting.
1. Create the action
- Go to Actions in the left menu.
- Select the Email card and click Create action.
- Enter an action name.
- (Optional) Enable press limits.
- Click Next.
2. Configure email details
- Enter one or more recipients.
- Select the email type: TEXT or HTML.
- Enter the subject.
- Write the email body.
- Click Save.
Your email action is ready. You can edit it anytime in the action overview.
How to make a HTTP action
An HTTP action sends a web request to your system when the bttn is pressed. Use this to trigger automations, call APIs, submit data, or integrate with workflow tools like Zapier.
1. Create the action
- Go to ACTIONS.
- Select the HTTP request card and click Create action.
- Enter an action name.
- (Optional) Enable press limits.
- Click Next.
2. Configure the request
- Choose a method: GET, POST, or PUT.
- Enter the base URL.
- Select authorization: None or Basic auth.
- Add optional params (query string).
- Add optional headers.
- If POST or PUT is selected, choose a body type and enter the body.
- Click Save.
3. Optional callback settings
- Open the saved action and go to Callback.
- Enable callback.
- Select a callback token.
- Choose a waiting time and its unit.
- (Optional) Set a limit for maximum concurrent presses.
- Click Save.
Your HTTP action is ready. The overview shows the configured request and callback settings.
How to make a Power Automate action
A Power Automate action triggers a Microsoft Power Automate flow.
Use this to build workflows across tools such as Teams, SharePoint, Excel, Dynamics 365 and more.
Note: A Premium Power Automate license is required to use the bttn connector.
1. Create the action
- Go to ACTIONS.
- Select the Power Automate card and click Create action.
- Enter an action name.
- (Optional) Enable press limits.
- Click Save.
2. Create the flow in Power Automate
- Go to powerautomate.microsoft.com.
- Create an Instant cloud flow.
- Select the trigger “When a bttn ONE action is triggered”.
- Sign in with your bttn credentials.
- Select the action you created and configure your flow.
3. Build your workflow
Add the steps you want, such as Teams messages, approvals, emails, service tickets, or data entry in Excel or SharePoint.
4. Save and activate
When the flow is active, each bttn press triggers it instantly. You can view past runs in the Run history section of Power Automate.
Your Power Automate action is now ready.
Adding an action to a bttn
After creating one or more actions, you need to link them to a bttn. This determines what happens when the button is pressed.

1. Open the bttns overview
- Go to BTTNS in the left menu.
- You will see a list of all registered bttns.
- If your bttn is not listed, click Register new bttn and complete the registration.
2. Select a bttn
- Click on the bttn you want to configure.
- Click Set actions, under My actions.
3. Map actions to button presses
- A pop-up appears where actions can be mapped to triggers.
- There are two available triggers:
- Single press big button
- Double press big button
- Each trigger shows a dropdown with all previously created actions.
- Select the action you want to assign to each trigger.
- Click Save.
Your bttn is now linked to one or more actions. Each time the button is pressed, the selected action will be triggered.


